
Tesla Company offers its clients a wonderful additional option The Tesla Wall Connector. This device helps owners of electric vehicles to set up a charging area in the garage or at the parking lot.
Contents:
What Tesla Wall Connector can do
For any Tesla owner (Model 3, X, S, Y compatible) when buying an electric car there is an acute problem of charging. The device allows charging your electric car at a speed of up to 44 miles (11.5 kW) per hour, which is quite suitable for home use.
The Silver or Black color scheme is available for the owner’s choice. The cable also has an optional length of 7.5 m (18′) or 2.5 m (8.5′), which limits the owners’ in choice of parking.
Price and where to buy
The official price for Wall Connector is around $560 (for the United States and North America) and €530 for the EU. But that’s assuming you can buy it in your country. Therefore, many buyers will have to pay approximately $620 regardless of delivery and purchase it either from Amazon or from local dealers. Note that this price is given for Tesla Wall Connector Gen 3 without taking into consideration of any installation cost if you need extra help.
 |  |
Tesla Wall Connector Installation Guide
The cost of installing and configuring the Tesla Wall Connector can reach up to $1,000, so it is a good reason to save – to plug it in at home by yourself (of course, if you have the skills and knowledge to do so).
Warning! If you have not familiar with the installation of electrical appliances, I recommend using a specialist, since an incorrect installation can be dangerous. We also strongly recommend reading the instructions from the official Tesla website. However, if you are confident in your skills, here is the basic installation process.
Mount to the wall and plug Tesla Connector
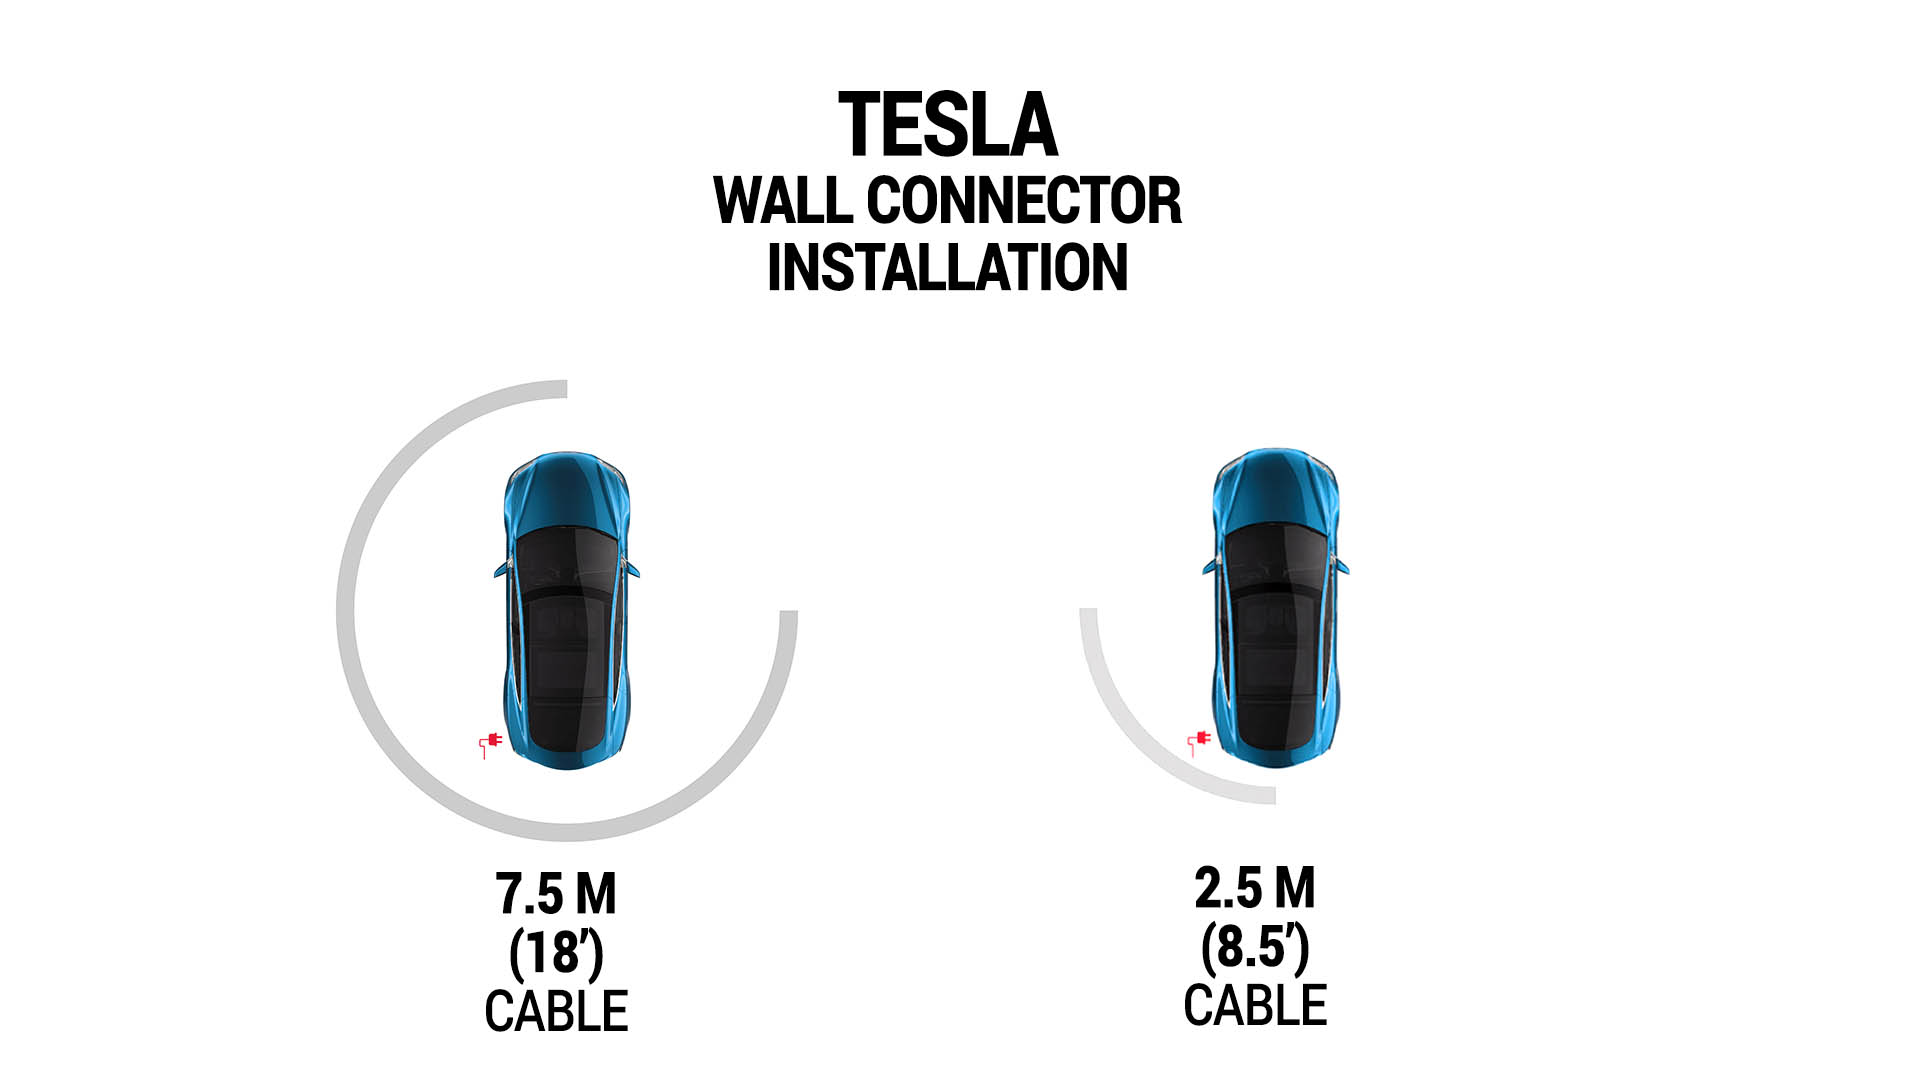
The first thing you must decide is where to install it. Schematically you can see the best places to install. On the image below the grey line marked zone the ideal places for installing Wallbox, depending on the parking place as well as the cable length. Since the charging port is in the rear left of the car, think about how you park into the garage more often – front or back. This is crucial for installation with short cable and almost is not a problem for 7.5 m cable.
Required tools and materials for installation: drill machine, drills 5/32 and 1/4, large flathead screwdriver, copper wire, water level, voltmeter or digital multimeter, wire stripper.
In fact, installing Wall Connector is very simple. Once you have chosen a location, you’ll need to plug in the power line, ideally with the maximum current you can find. Separate the back plate of the device and choose how conduit will run the cable, depending on your line.

Also make sure the power supply is fitted with a fuse, depending on the charge current. If your auto and line supports Dual Chargers – 80 A. Depending on the current strength of the line – 50 (for 40 A), 40 (for 32 A), 30 (for 24 A), 20 (for 16 A), or 15 A circuit breaker for 12 A.
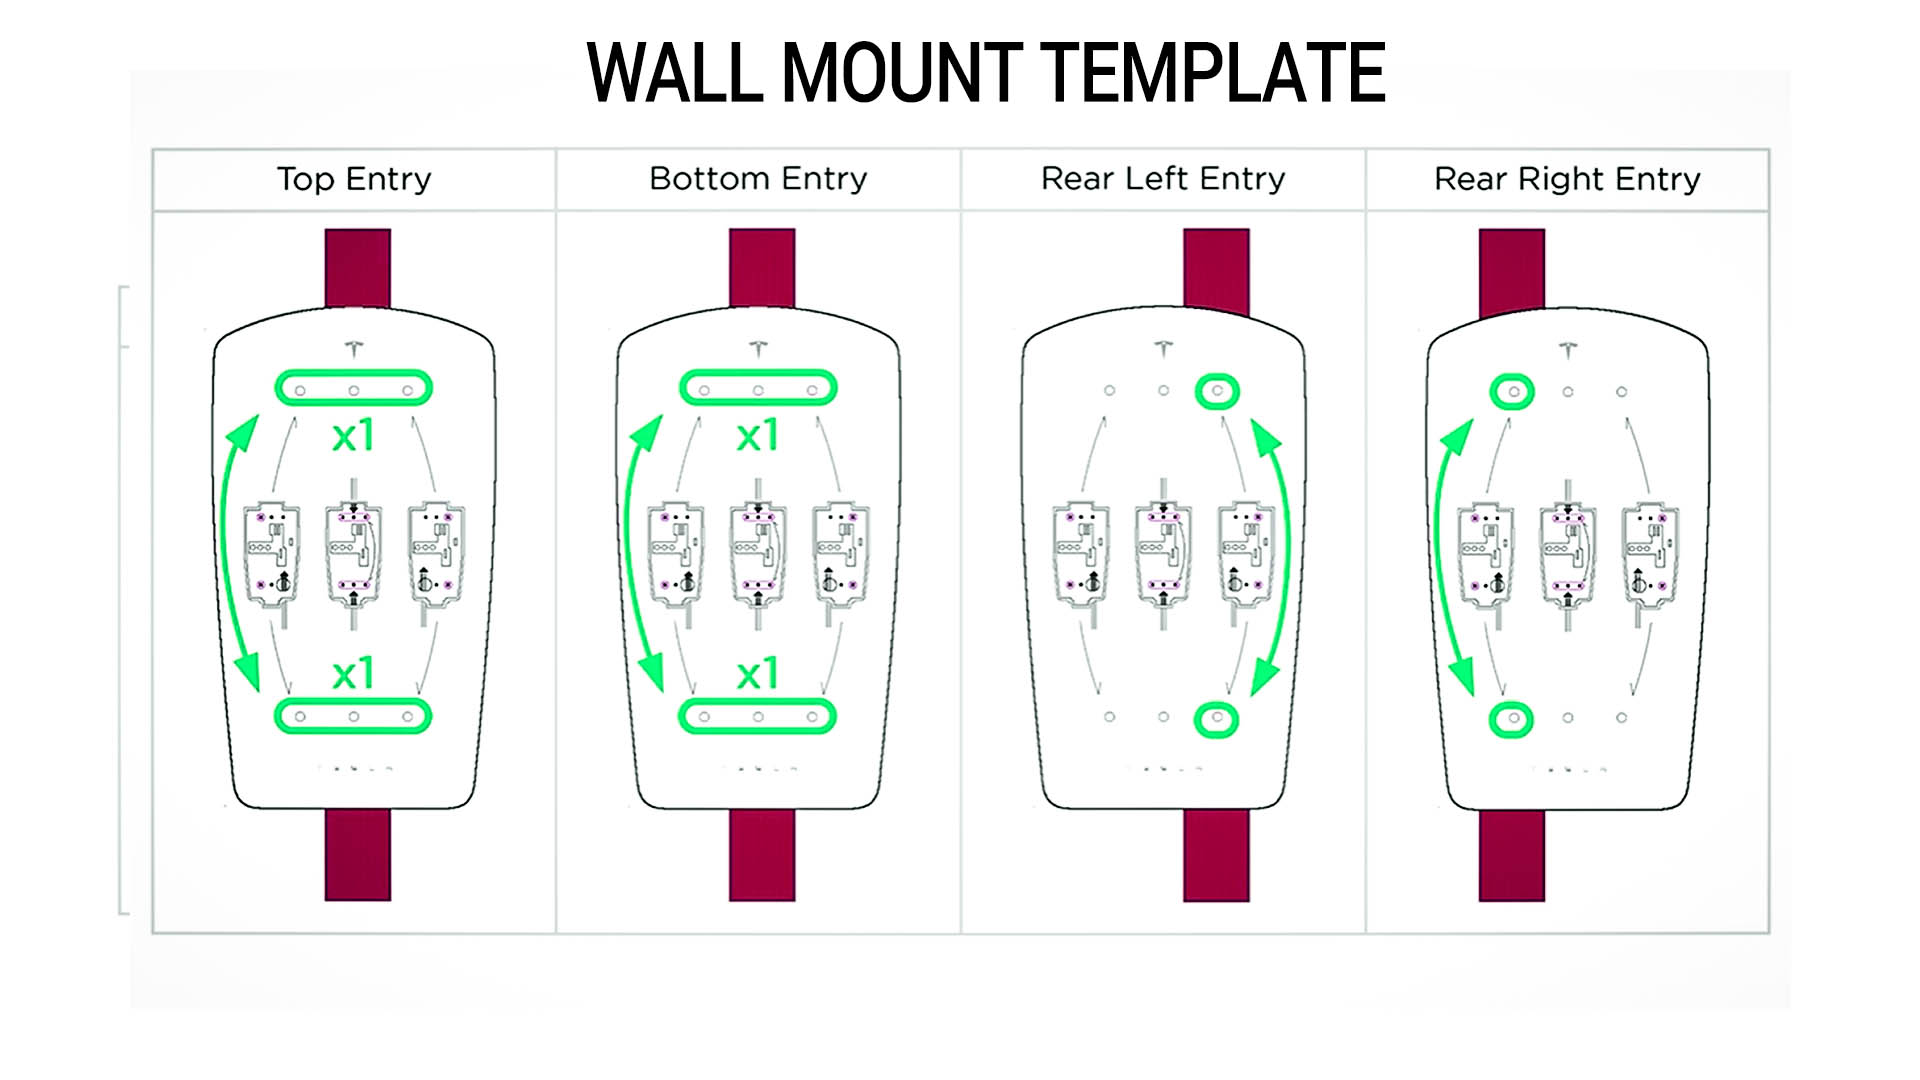
Measure the height at which the device will be from the floor. The maximum height of the installation is 60″ (150 cm), minimum – 18″ (45 cm) indoor or 24″ (60 cm) outdoor. Ideal height for average people is recommended 45″ (115 cm). Depending on the conduit selected, use the template that comes with the device for marking the holes under the fastenings.

Drill holes in the wall with a drill bit 5/32 (4 mm) and a rear cover with a 1/4 (6.5 mm) of the device, one at the top and one at the bottom. After that, use the two-by-two self-cutting kit and the HEX bit to secure the back cover to the wall.

Install conduit and then, depending on where the wires are stretched, lead them through the box.
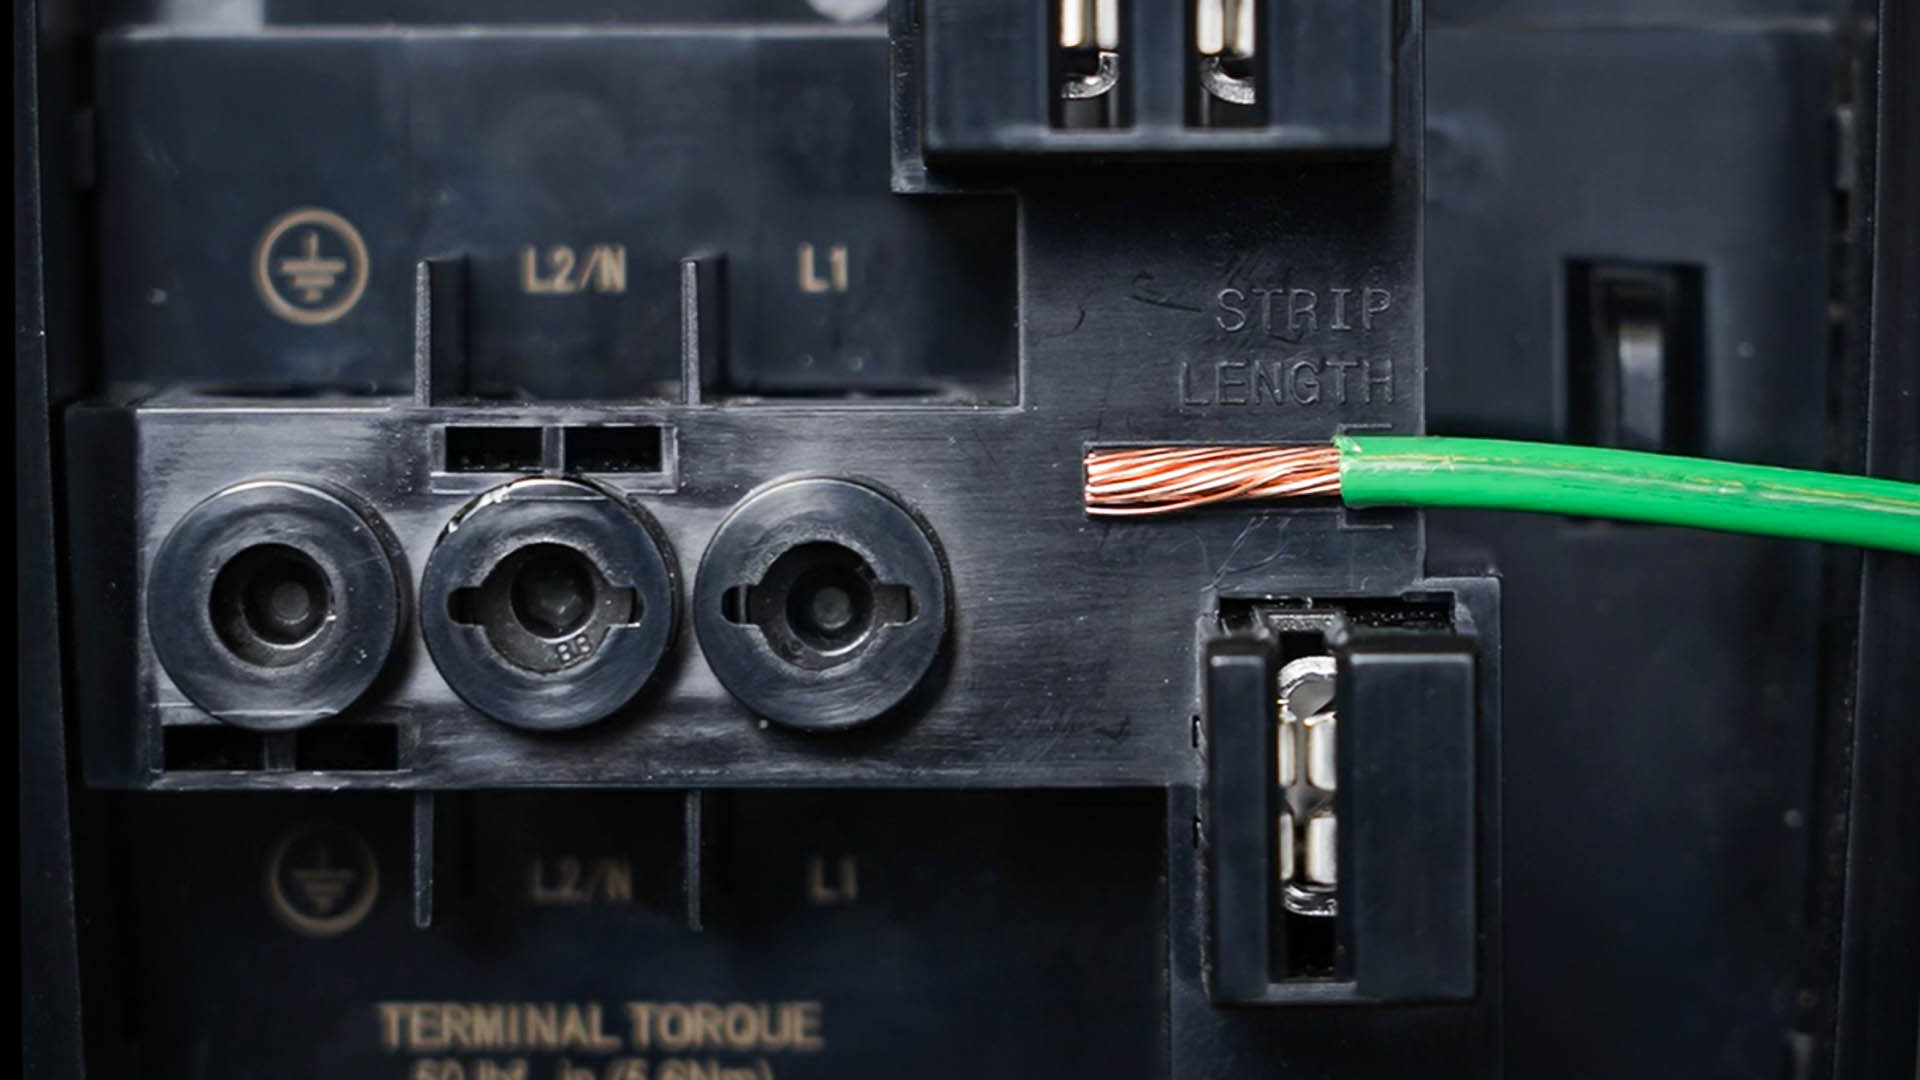
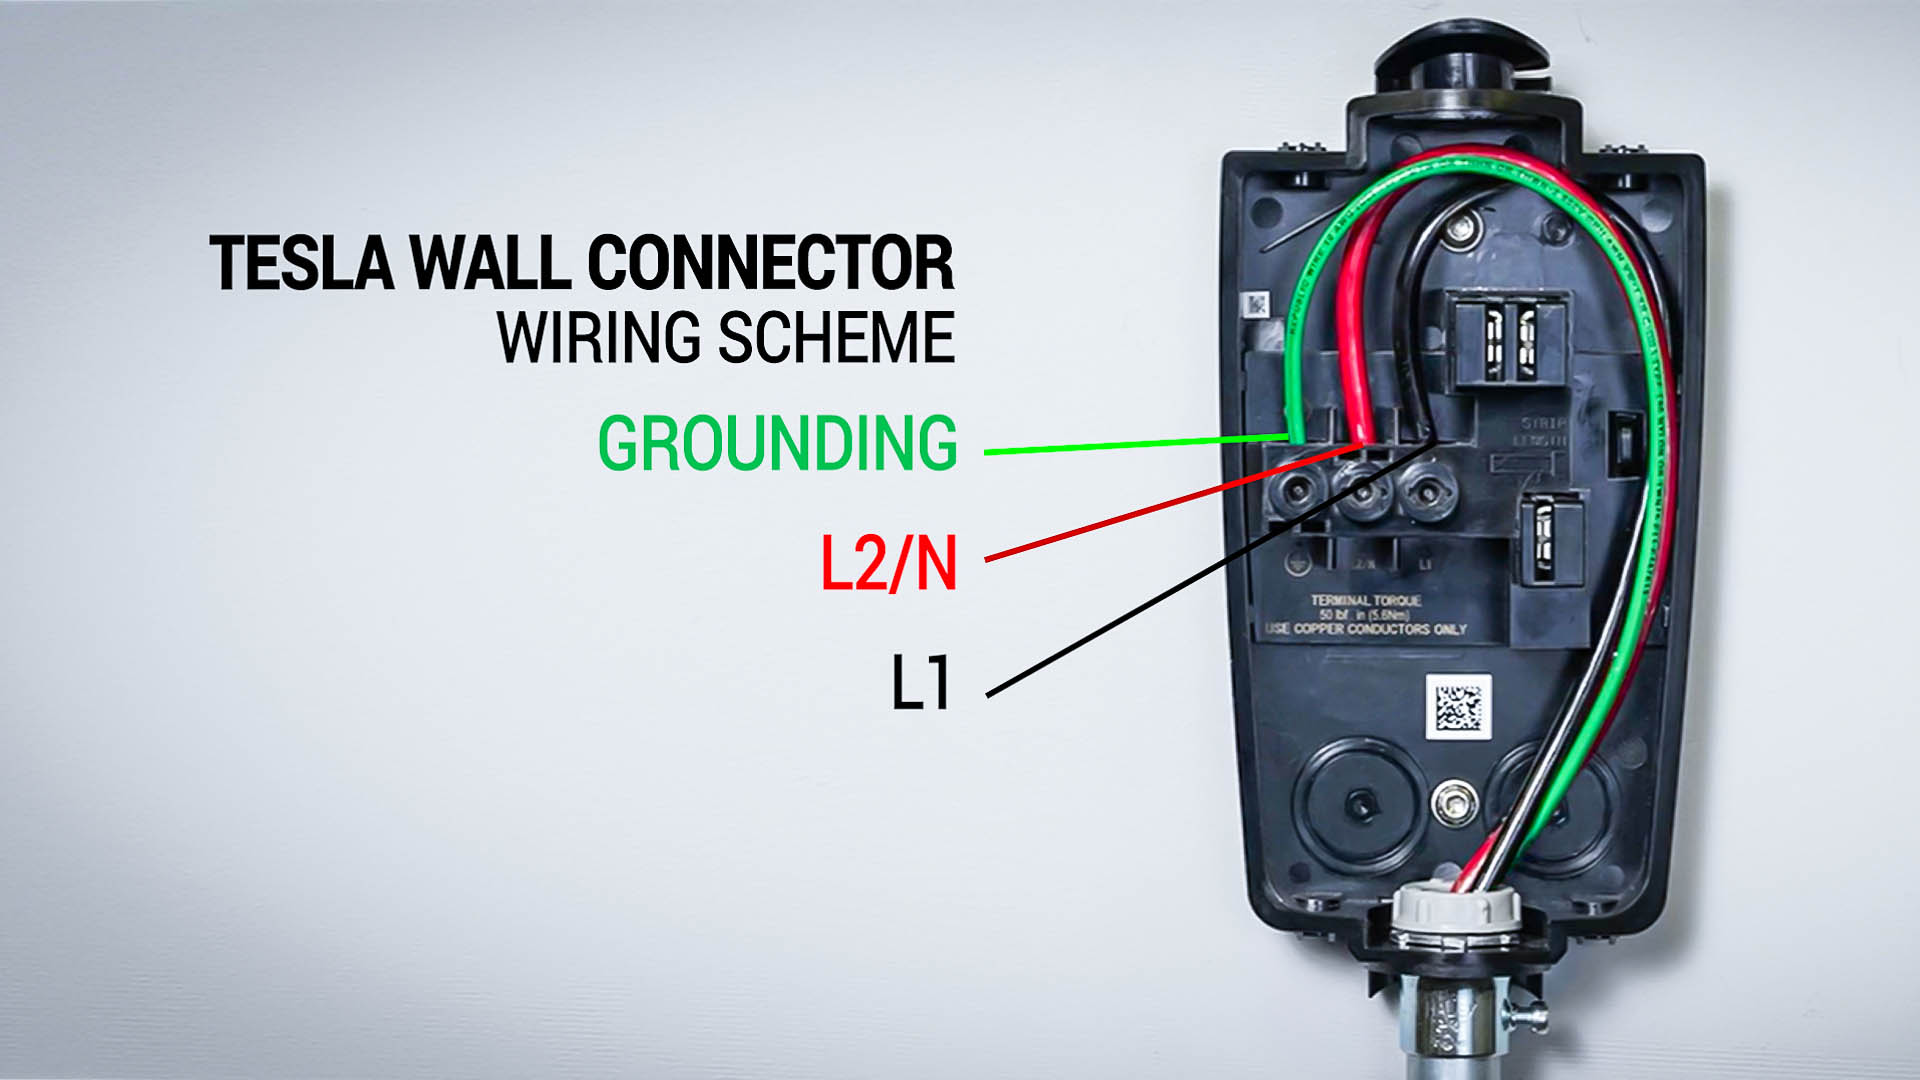
Clear the wires from the insulation and connect them to the device on the left to the right: Grounding, L2/N, L1. Attach the wires with a force of 50 in/lbs (6 Nm). After stretching the wires, attach them to the set with zip tie.
This option is not valid for devices that support NEMA 14-50, they only need plug-in to socket.
After installing the wiring, take the front cover of the Wallbox and connect it to the back. Twist it four times with a self-cutting set. Roll the cable around the station counterclockwise and set the port on its anchorage.
Setting up Wall Connector
Once you have finished the installation, you will need a Wi-Fi plug-in device. The upper green light on the display lights. By default, within five minutes of turning on the power, Wall Connector begins to broadcast the Wi-Fi network. Connect to it via QR code or SSID “tesla” (password located on start guide in line WPA2 or on the device itself on the back of the front cover). Go to http://192.168.92.1 or scan the QR code.
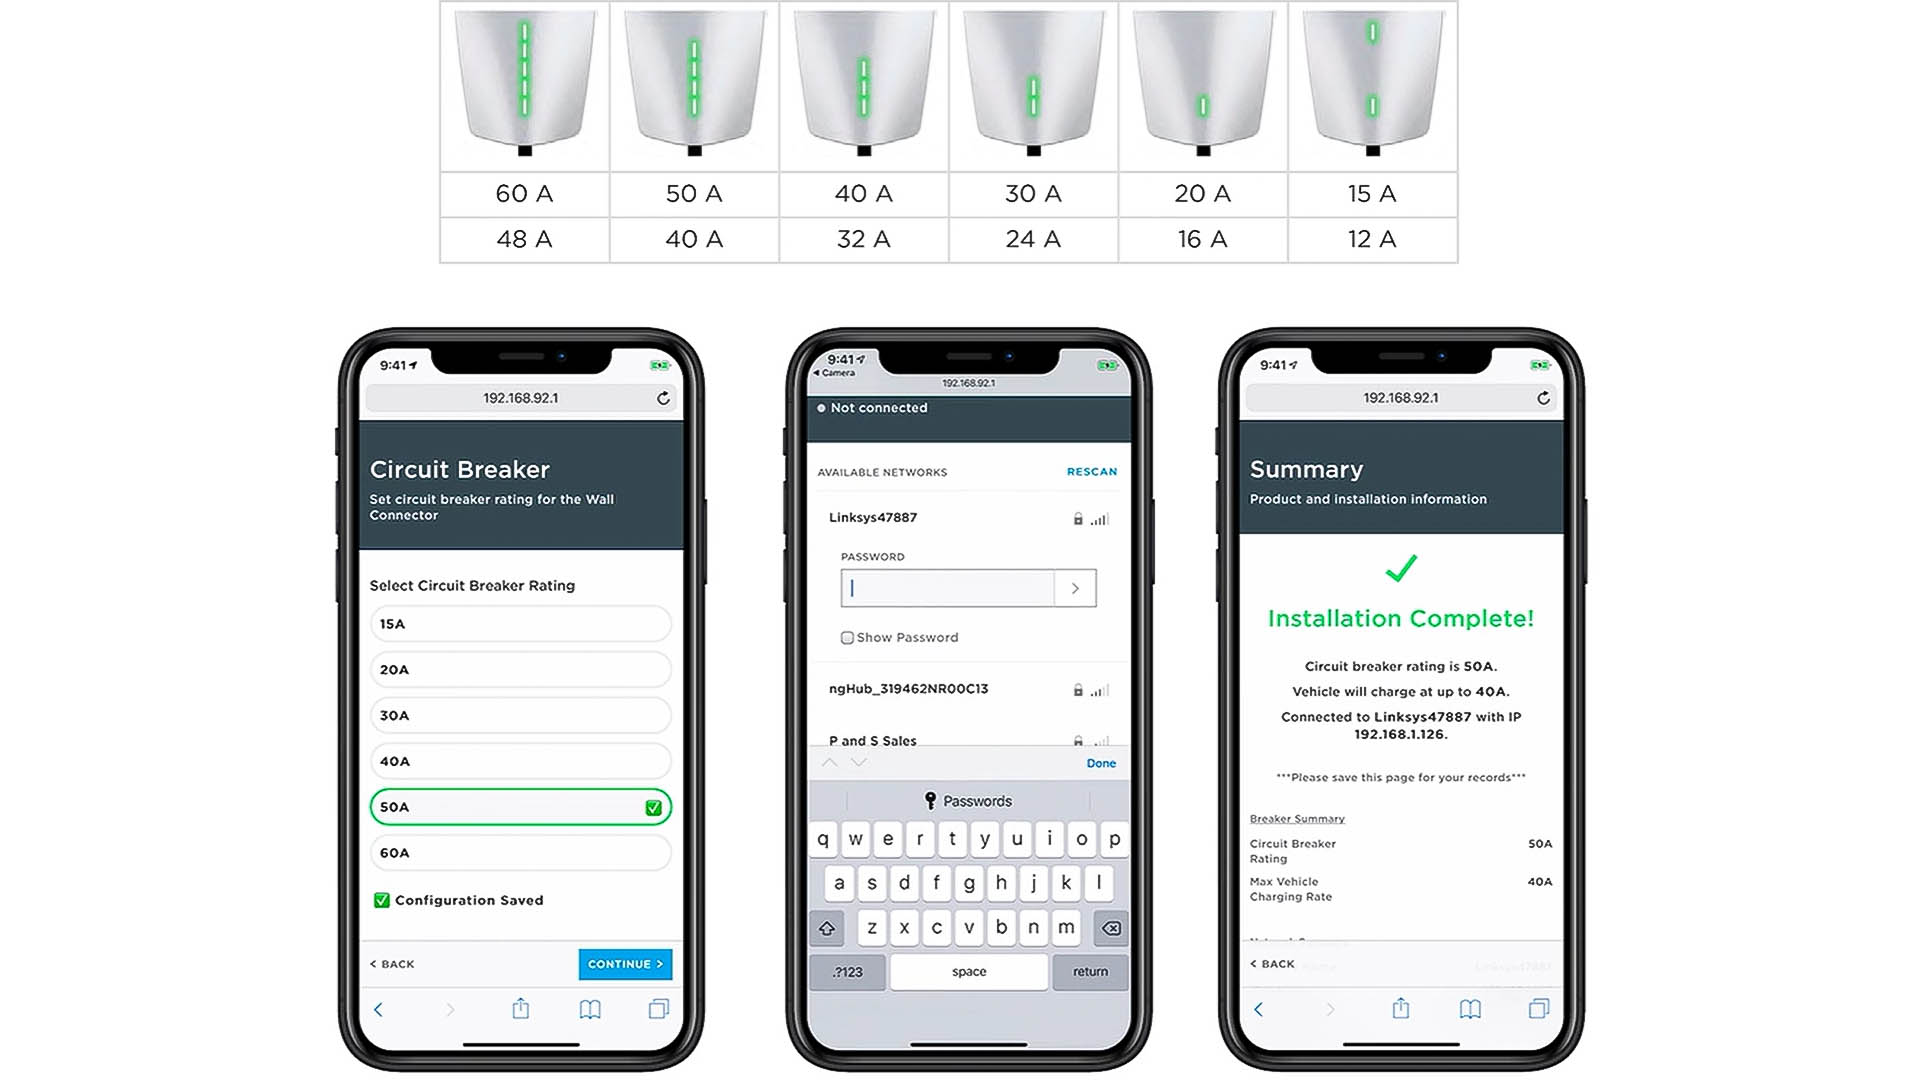
Select which fuse is installed on the electrical line to which Wall Connector is connected in the opened page. Your choice will be confirmed by the LED indicator of the front cover. It can also be rechecked by long pressing a button on the plug connector, after which the diodes with the code light again.
Then connect your device to your home Wi-Fi, to upgrade your firmware and get information about EV charging. At this point, Wall Box Connector is ready to charge your electric car. Bring the plug to the connector, press the button, and start charging.
Should You buy a Wall Connector Box?
If there is no Supercharger Station nearby, and your Tesla is equipped with Dual Connector, the Tesla Wall Connector will provide charging at 30-44 miles of range per hour. In this case, the availability of the Wall Box greatly simplifies the charging process and is necessarily worth buying.
If the house is equipped with a NEMA 14-50 socket (or IEC 60309 Three Phase Current Socket for Europe) and the EV does not have a Twin Charger option, a mobile charger bundled with Tesla will allow charging it at 20-30 miles of range per hour. Wall Connector will run at about the same speed, so you won’t have to buy it, you won’t see any difference.
![]()
Tesla Wall Connector – Electric Vehicle (EV) Charger on Amazon
Tesla Wall Connector Alternatives
Tesla Wall Connector (Gen 3) has many competitors. But a $500 competitive price is better than many competitors:
A comparison table puts everything in its place. Despite the short cable (we hope soon Elon Musk will decide to lengthen), Tesla Connector’s competitors are low in price:
| Name | Output | Wi-Fi | Cable Length | Price |
|---|---|---|---|---|
| Tesla Wallbox Connector (Gen 3) | 48A | Yes | 18' (5.5 m) | $500 |
| Enel X JuiceBox | 40A | Yes | 25' (7.6 m) | $599 |
| Bosch Powermax 2 | 30A | Optional | 25' (7.6 m) | $849 |
| ClipperCreek HCS-60 | 32A | No | 25' (7.6 m) | $899 |
| Grizzle-E Classic | 40A | No | 24' (7.3 m) | $399 |
Tesla Wall Connector Video
Installation of Tesla Connector


